In this tutorial, I’d like to share what I learned recreating Studio Märtens project page design.
I used Webflow to build the page, CurtainsJS to implement WebGL, GSAP to animate elements and Lenis to make the scrolling smooth.
There are a few parts that I was interested to learn and implement.
- understand how CurtainsJS works
- use Lenis for smooth scrolling experience
- add custom vertex and fragment shaders that react to scroll
- create intro and on scroll animations
- structure the code using ES6 Javascript class syntax
### Links:
- [Demo](https://maertens.webflow.io/)
- [Github repo](https://github.com/maray29/maertens)
- Codesandbox
- [Webflow cloneable](https://webflow.com/made-in-webflow/website/maertens)
### Libraries and tools used on this project:
- Webflow
- Vanilla Javascript
- CurtainsJS (WebGL)
- Lenis
- GSAP
- SplitType
- Vite
- GPT (copy)
- Midjourney (images)
This tutorial focuses on Javascript. The html/css are pretty straightforward. You can have a look at the cloneable and github repo to understand how it’s built.
Let’s get started.
## Part 1 - WebGL - CurtainsJS - Lenis
Once the html and css were done, I started to work on the interesting part: WebGL.
There are several libraries that are built on top of WebGL, such as Three.js, OGL and Pixi.js. I chose Curtains.js because its main feature is to turn html images into webgl planes while making them responsive and accessible.
I read through the documentation, chose an example that was similar to the build that I wanted to implement and started experimenting and trying understand how the library works.
It was a lot of back and forth, but slowly things came together.
Here’s the main structure of the code:
```js
/* eslint-disable no-unused-vars */
import Lenis from '@studio-freight/lenis'
import { Curtains, Plane, Vec2 } from 'curtainsjs'
import gsap from 'gsap'
import { ScrollTrigger } from 'gsap/ScrollTrigger'
import SplitType from 'split-type'
import fragment from './shaders/fragmentShader.glsl'
import vertex from './shaders/vertexShader.glsl'
gsap.registerPlugin(ScrollTrigger)
// App class to structure and init the code
class App {
constructor() {
this.init()
}
// Initialize all methods
init() {
this.createLoaderAnimation()
this.createCurtains()
this.setupCurtains()
this.createLenis()
this.createPlanes()
this.createPageAnimations()
}
// (fake) loader animation
createLoaderAnimation() {
...
}
// Initialize Curtains and WebGL
createCurtains() {
}
// Methods on Curtains such as .onRender, .onScroll, etc.
setupCurtains() {
...
}
// Smooth scroll
createLenis() {
...
}
// Get html planes and create Curtains (webgl planes.
createPlanes() {
...
}
// Methods to call on Plane such as .onRender, .onReady, etc.
handlePlanes(plane) {
...
}
// Intro and page animation
createPageAnimations() {
...
}
}
window.addEventListener('load', () => {
const app = new App() // eslint-disable-line
console.log('Loaded')
})
```
First, let’s declare some variables that we’ll need later.
```js
// App class to structure and init the code
class App {
// Curtains object
curtains
// Smooth scroll Lenis object
lenis
// WebGL planes
planes = []
// Scroll value that we'll use to animate plane deformation
scrollEffect = 0
// An object where we store all the DOM elements
DOM = {
h1: document.querySelector('h1'),
planeElements: [...document.querySelectorAll('[data-animation="image"]')],
heroImage: document.querySelector('.project_header_img'),
heroWebGlPlane: null,
paragraphs: [...document.querySelectorAll('[data-animation="paragraph"]')],
wheel: document.querySelector('.wheel_icon'),
wheelWrapper: document.querySelector('.wheel_wrapper'),
pageWrap: document.querySelector('.page-wrapper'),
}
// An object where we store timelines and track animation state
animationState = {}
constructor() {
this.init()
}
// Rest of the code
}
window.addEventListener('load', () => {
const app = new App() // eslint-disable-line
console.log('Loaded')
})
```
Next, we’ll begin implement methods outlined in `init()` function starting with `createCurtains()`.
[Curtains](https://www.curtainsjs.com/curtains-class.html) class instantiates WebGL context and handles the scene that contains our 3d planes.
It is pretty self-explanatory. Here we create a curtains object with a few defined options.
```js
createCurtains() {
this.curtains = new Curtains({
// HTML canvas element, specified with id
container: 'canvas',
// limit pixel ratio for performance
pixelRatio: Math.min(1.5, window.devicePixelRatio),
// Set watchScroll to false since we are going to use Lenis as our scroll manager
watchScroll: false,
})
}
```
And setup curtains with `setupCurtains()` so that we can update our scrollEffect value and catch some errors. Almost the same as in the curtainsjs [example](https://www.curtainsjs.com/examples/multiple-planes-scroll-effect-custom-scroll/index.html) I took as a base.
```js
setupCurtains() {
this.curtains
.onRender(() => {
// update our planes deformation
this.scrollEffect = this.curtains.lerp(this.scrollEffect, 0, 0.075)
})
.onScroll(() => {
// get scroll deltas to apply the effect on scroll
const delta = this.curtains.getScrollDeltas()
// invert value for the effect
delta.y = -delta.y
// threshold
if (delta.y > 60) {
delta.y = 60
} else if (delta.y < -60) {
delta.y = -60
}
if (Math.abs(delta.y) > Math.abs(this.scrollEffect)) {
this.scrollEffect = this.curtains.lerp(
this.scrollEffect,
delta.y,
0.5
)
}
})
.onError(() => {
// we will add a class to the document body to display original images
document.body.classList.add('no-curtains', 'planes-loaded')
})
.onContextLost(() => {
// on context lost, try to restore the context
this.curtains.restoreContext()
})
}
```
The next method is `createLenis()` where we setup [Lenis scroll manager](https://github.com/studio-freight/lenis) by Studio Freight.
All of its options and methods are well explained in the documentation on Github.
```js
createLenis() {
this.curtains.disableDrawing()
this.lenis = new Lenis({
duration: 2.5,
easing: (t) => Math.min(1, 1.001 - Math.pow(2, -10 * t)),
direction: 'vertical', // vertical, horizontal
gestureDirection: 'vertical', // vertical, horizontal, both
smooth: true,
mouseMultiplier: 1,
smoothTouch: false,
touchMultiplier: 2,
infinite: false,
})
this.lenis.on('scroll', ({ scroll }) => {
// update our scroll manager values
this.curtains.updateScrollValues(0, scroll)
// render scene
this.curtains.needRender()
})
gsap.ticker.add((time) => {
this.lenis.raf(time * 1000)
})
}
```
Now it’s time to create out planes with `createPlanes()` method.
```js
createPlanes() {
// Parameters to use when creating planes
const params = {
// Shaders
vertexShader: vertex,
fragmentShader: fragment,
// Geometry tesselation
widthSegments: 20,
heightSegments: 20,
// Scroll effect uniform
uniforms: {
scrollEffect: {
name: 'uScrollEffect',
type: '1f',
value: 0.0,
},
},
}
// add our planes and handle them
for (let i = 0; i < this.DOM.planeElements.length; i++) {
const plane = new Plane(this.curtains, this.DOM.planeElements[i], params)
// Store planes in an array we declared at the beginning
this.planes.push(plane)
// Dome somthing with planes
this.handlePlanes(plane)
}
this.DOM.heroWebGlPlane = this.planes[0]
}
// handle all the planes
handlePlanes(plane) {
// Similar to CSS z-depth
plane.setRenderOrder(-10)
plane
.onReady(() => {
// once everything is ready, display everything
if (plane === this.planes[this.planes.length - 1]) {
document.body.classList.add('planes-loaded')
}
})
.onRender(() => {
// pass the uniform to shader when the intro animation is not active
if (!this.animationState.pageIntroTimeline.isActive()) {
plane.uniforms.scrollEffect.value = this.scrollEffect
}
})
}
```
If you implement these methods and initialize the App, everything will work but you wont see any difference from regular html and css. The WebGL planes will look exactly like html because we haven’t yet written the vertex and fragement shader code.
If you are not yet familiar wth GLSL, here are few resources that will get you started:
- [Book of Shaders](https://thebookofshaders.com/)
- Articles and resources from [Inigo Quilez](https://iquilezles.org/)
- Youtube: [Akella](https://www.youtube.com/@akella_) and many others
- Codrops tutorials
I am still learning and trying to understand how glsl works, but here’s the breakdown of vertex and fragment shaders.
First of all, these shaders are usually either created in html inside `<script type="x-shader/x-fragment">` and `<script type="x-shader/x-vertex">` tags or as a string in the javascript file.
The former option is widely used with [Three.js examples](https://github.com/mrdoob/three.js/blob/master/examples/webgl_shader2.html), the latter you can find in [Curtains.js examples](https://github.com/martinlaxenaire/curtainsjs/blob/master/examples/multiple-planes-scroll-effect-custom-scroll/js/multiple.planes.parallax.setup.js).
The other option is to write them in separate files and import where you need them. The advantage is syntax highlighting and autocompletion. Compare these two:
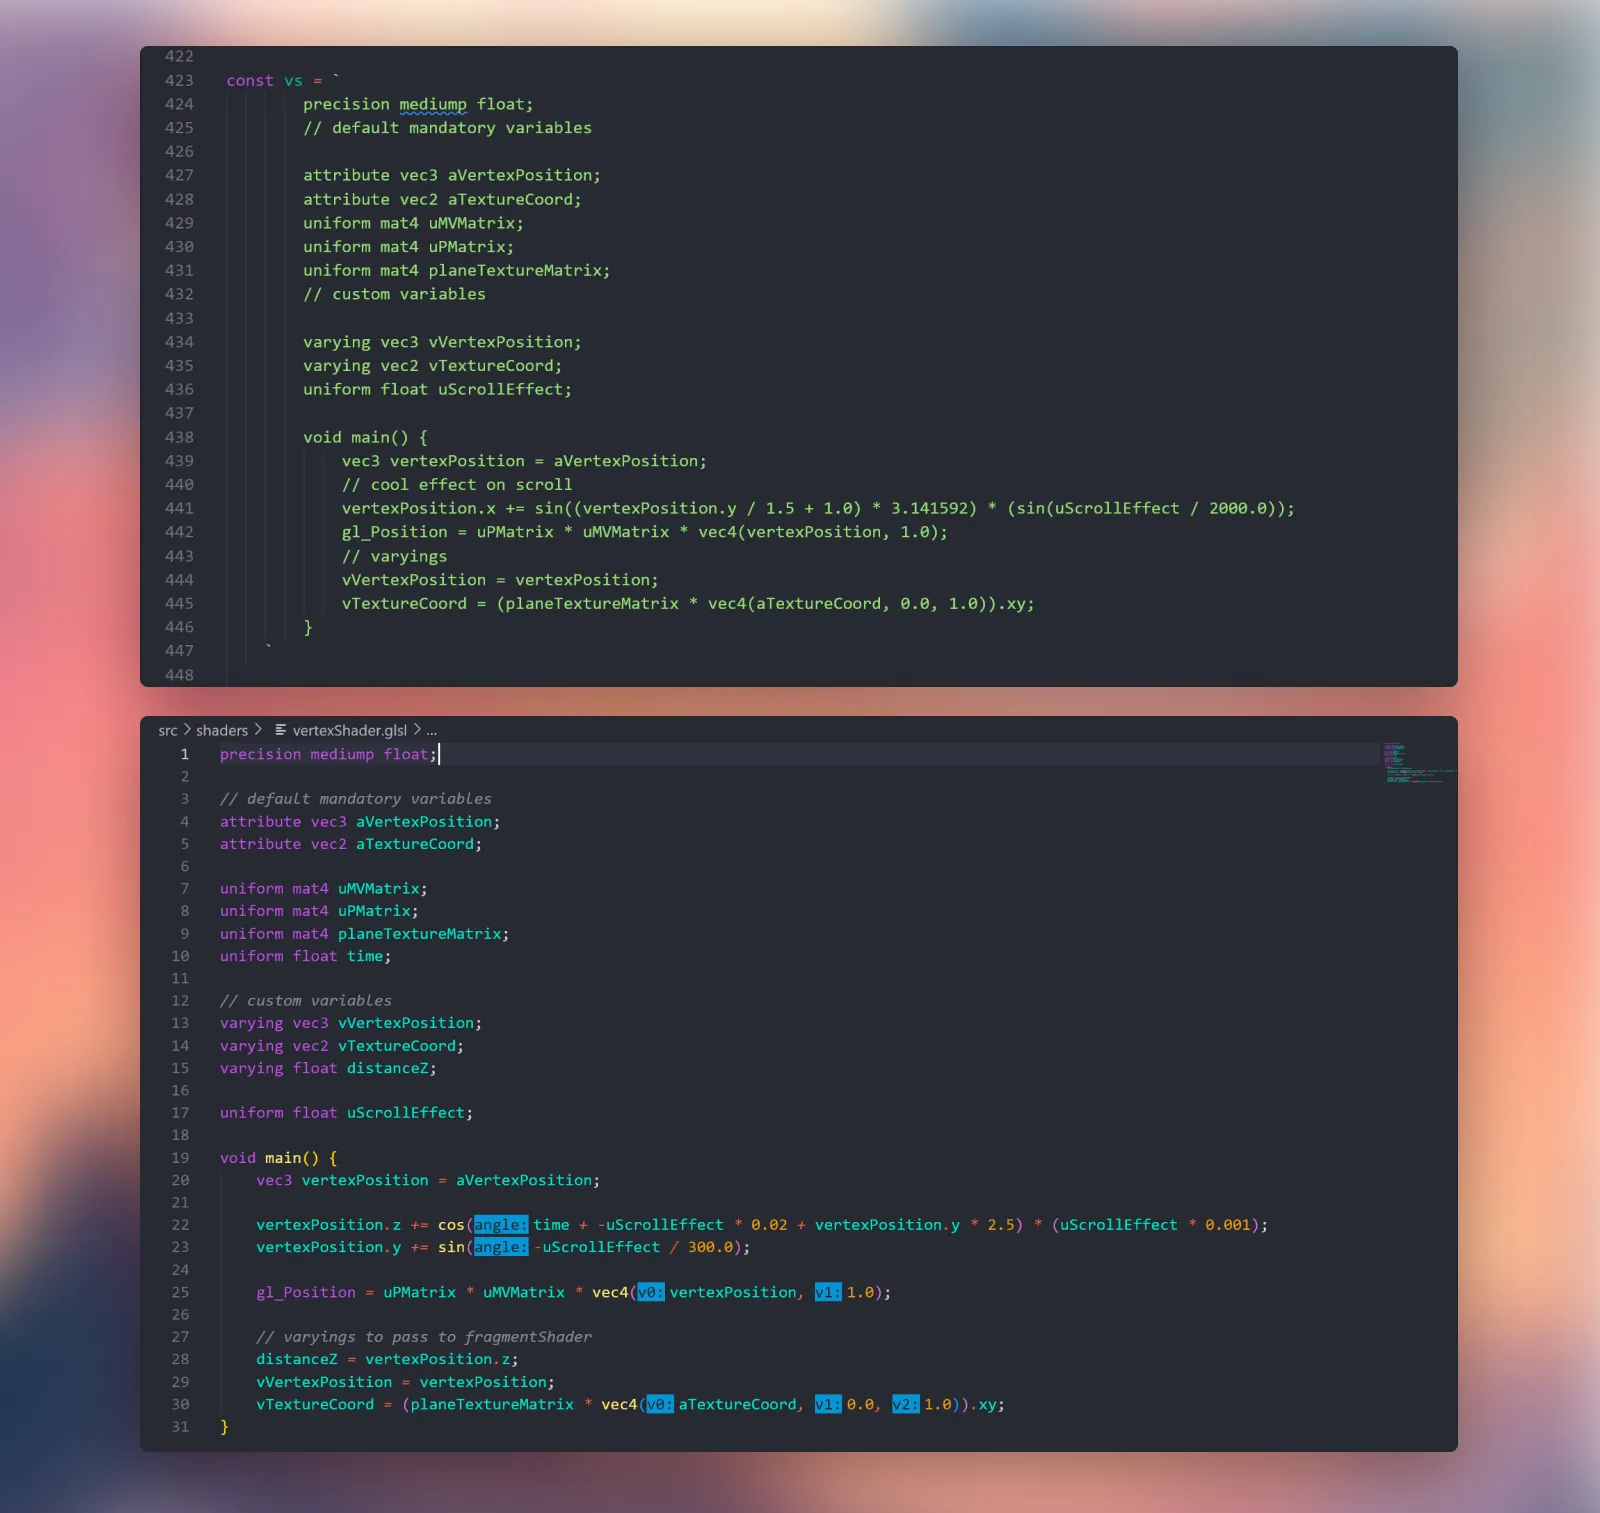
It’s clear that it’s much easier to read, write and understand with syntax highlighting.
To be able to import shader code from external files, you need plugins. Since I use Vite development environment, I found `vite-plugin-glsl` that does exactly that. There’re other ways, but I found this plugin the easiest to use.
Shader files are stored in `./src/shaders/vertexShader.glsl` and `fragmentShader.glsl`.
Let’s start with vertex shader.
```glsl
// Support OpenGL ES for simpler, cheaper hardware, and low enough power
// requirements to run on batteries
precision mediump float;
// default mandatory variables, learn more here: https://www.curtainsjs.com/get-started.html
attribute vec3 aVertexPosition;
attribute vec2 aTextureCoord;
// built-in uniform variables
uniform mat4 uMVMatrix;
uniform mat4 uPMatrix;
uniform mat4 planeTextureMatrix;
uniform float time;
// custom variables that we pass to fragment shader
varying vec3 vVertexPosition;
varying vec2 vTextureCoord;
varying float distanceZ;
// our custom variable that we update on scroll and pass it through plane.onRender method
uniform float uScrollEffect;
void main() {
// Get original vertices positions
vec3 vertexPosition = aVertexPosition;
// Change vertices z position using math and uScrollEffect variable
// play with the values to change the effect, waves number, etc
vertexPosition.z += cos(time + -uScrollEffect * 0.02 + vertexPosition.y * 2.5) * (uScrollEffect * 0.001);
// Change vertices y position on scroll
// Notice the slight vertical shift on the planes when you scroll
vertexPosition.y += sin(-uScrollEffect / 300.0);
// use built-in gl_Position to set all vertices positions
gl_Position = uPMatrix * uMVMatrix * vec4(vertexPosition, 1.0);
// varyings to pass to fragmentShader
distanceZ = vertexPosition.z;
vVertexPosition = vertexPosition;
vTextureCoord = (planeTextureMatrix * vec4(aTextureCoord, 0.0, 1.0)).xy;
}
```
```glsl
precision mediump float;
// variables that we passed from vertex shader
varying vec3 vVertexPosition;
varying vec2 vTextureCoord;
varying float distanceZ;
// the texture that curtains.js takes from html images and passes to fragment shader
uniform sampler2D planeTexture;
void main(void) {
// Final color.
vec3 color = vec3(0.2, 0.3, 0.7);
color.r = texture2D(planeTexture, vTextureCoord).r;
color.g = texture2D(planeTexture, vTextureCoord).g;
color.b = texture2D(planeTexture, vTextureCoord).b;
// distanceZ is the value passed from the vertex shader when the plane deforms in z direction
// when it does, we want to highlight that motion with color
if (distanceZ > 0.0) {
color += 0.145 * distanceZ * 30.0;
}
// use built-in gl_FragColor to set color
gl_FragColor = vec4(color, 1.0);
}
```
Yay! Now we can see some difference from plain html. If you scroll, you can see how planes deform and the crest of the wave is highlighted. Pretty cool, right?
## Part 2 - Animation - GSAP - SplitType
Let’s start working on motion of the page and its elements - the most fun part.
We’ll use GSAP to tween values and animate elements and SplitType to split paragraphs and text into lines and words.
If you check Studio Maertens website, you’ll see that there are three parts of the motion design:
- preloader animation
- intro animation
- on-page scroll reveal
Let’s start with the preloader. It’s common for websites that use 3d models and webgl to have preloaders as it’s more time consuming to load 3d data than text and images. That’s why everything is loaded first, and then displayed.
The project page I’ve built takes 250-500ms to load so there’s really no need for any preloader. However, I wanted to replicate the motion design and page transition. That’s why I created a fake preloader where the wheel spins for a moment, moves to the bottom left corner of the screen and then rotates on scroll.
As a side note, I don’t recommend creating a preloader when there’s no good reason for it. It’s not a good practice to make the user wait for nothing. If it’s part of the experience, don’t make it longer than 2 seconds.
After the preloader is finished, the page intro animation starts. The hero plane flows in, and the text elements are revealed from bottom of their containers. The text elements that are not yet visible, would be revealed when they appear in the viewport.
Let’s start with the preloader.
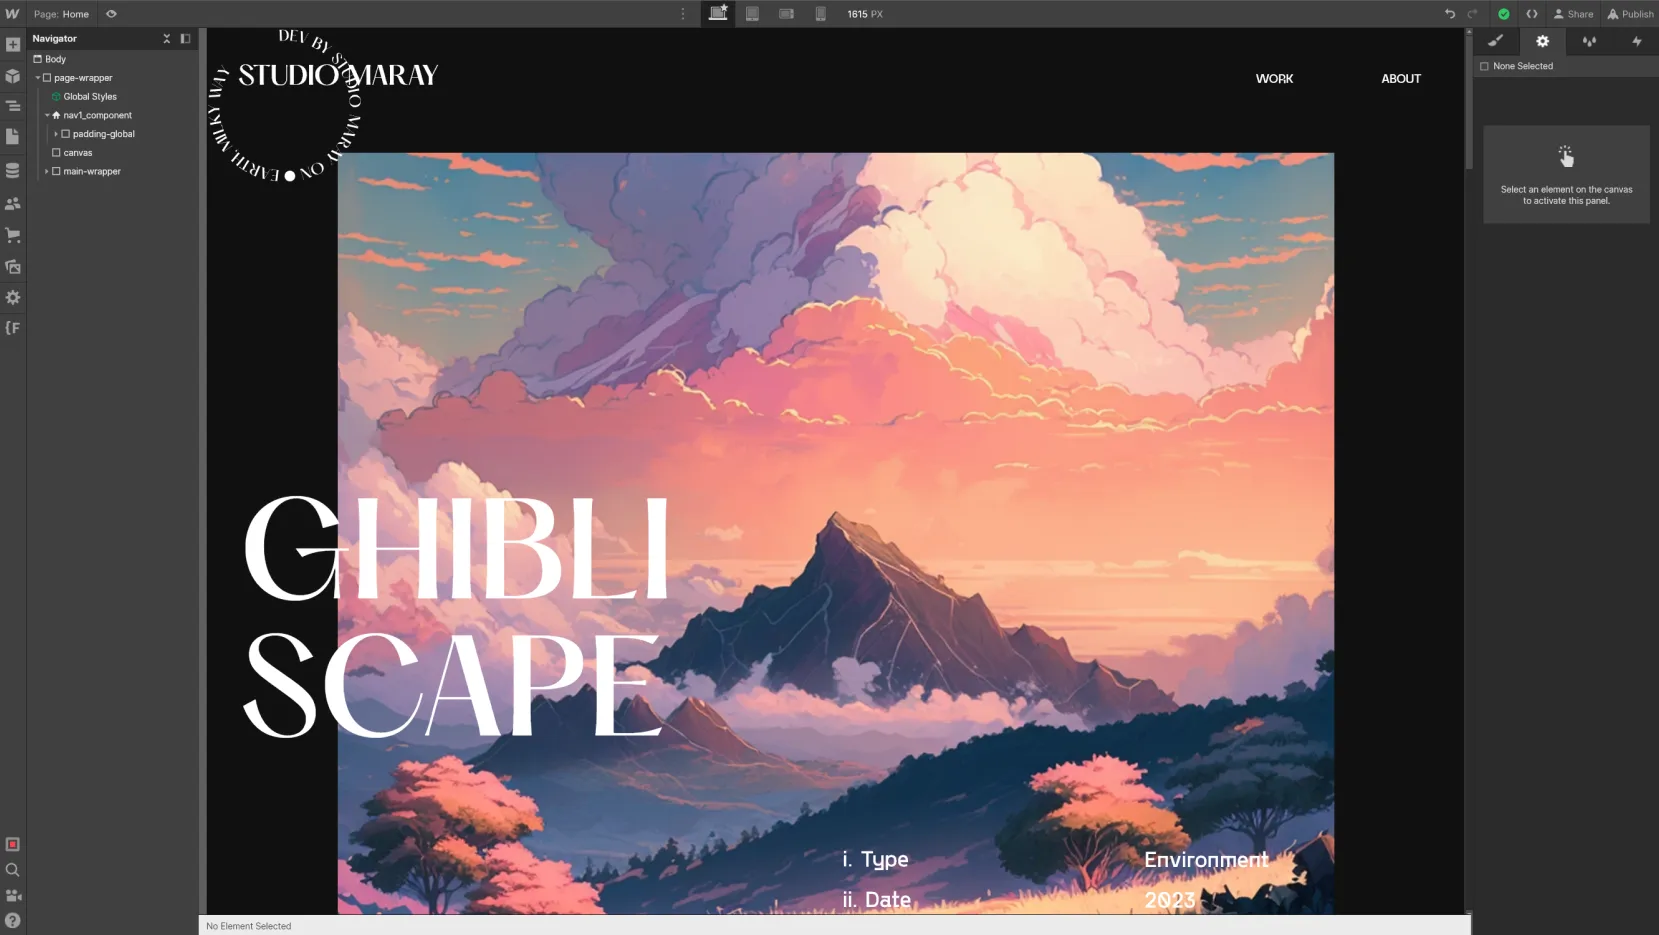
You can see the wheel in upper left corner. It’s a simple wrapper and an svg element I created in Figma.
In the original design, the wheel rotates while the number that represents the progress goes from 0 to 100. We’ll omit the number sequence since it’s a fake preloader and only use the wheel rotation. When the page is ready, the wheel moves to the bottom left corner and the loader sequence is finished.
Remember we defined all the DOM elements in a DOM object? We’ll use it conviniently to access all the elements we needs.
```glsl
class App {
...
DOM = {
h1: document.querySelector('h1'),
planeElements: [...document.querySelectorAll('[data-animation="image"]')],
heroImage: document.querySelector('.project_header_img'),
heroWebGlPlane: null,
paragraphs: [...document.querySelectorAll('[data-animation="paragraph"]')],
wheel: document.querySelector('.wheel_icon'),
wheelWrapper: document.querySelector('.wheel_wrapper'),
pageWrap: document.querySelector('.page-wrapper'),
}
...
init() {
this.createLoaderAnimation()
...
}
createLoaderAnimation() {
...
}
}
```
We’ll create a method `createLoaderAnimation()` and initalize it with `init()`.
Since we want everything to wait until the preloader is finished, we’ll use javascript `Promise` and `async/await` syntax.
```js
createLoaderAnimation() {
const loaderDuration = 2
// return the sequence as a Promise so that we can wait until it's finished
return new Promise((resolve) => {
// Our loader timeline stored in animationState object
this.animationState.pageLoaderTimeline = gsap.timeline()
}
```
We could also use GSAP `onComplete` callback, but I wanted to learn a new way to asynchronously call functions. It also felt weird to initialize other key methods of the class from GSAP timeline. With `Promise` syntax, we can do the following:
```js
createLoaderAnimation() {
const loaderDuration = 2
// return the sequence as a Promise so that we can wait until it's finished
return new Promise((resolve) => {
// Our loader timeline stored in animationState object
this.animationState.pageLoaderTimeline = gsap.timeline()
this.animationState.pageLoaderTimeline.to(this.DOM.wheelWrapper, {
// Animation settings go here
// Resolve when the sequence is finished
onComplete: resolve,
})
}
```
And then make `init()` `async` and `await` `createLoaderAnimation()`.
```js
async init() {
await this.createLoaderAnimation()
...
}
```
With this setup, `init()` will wait `createLoaderAnimation()` and then initialize other methods. Pretty cool.
With the structure and flow set, let’s define what values need to be tweened/animated.
Since the wheel is in the wrong position in our html, we’ll set it with GSAP:
```js
createLoaderAnimation() {
const loaderDuration = 2
return new Promise((resolve) => {
this.animationState.pageLoaderTimeline = gsap.timeline()
// page loading
this.animationState.pageLoaderTimeline.set(this.DOM.wheelWrapper, {
// Move the wheel to the center of the screen
x: innerWidth / 2,
y: innerHeight / 2,
// Move the wheel half of its width to the left and down
xPercent: -50,
yPercent: -50,
scale: 1.4,
})
}
```
And now we’ll rotate it for 2 seconds and move it to the bottom left corner.
```js
this.animationState.pageLoaderTimeline.to(this.DOM.wheelWrapper, {
// In CSS we set visibility: hidden so that there's no FOUC
// That's why we set autoAlpha to 1 to make it visible
// Read more here: https://greensock.com/fouc/
autoAlpha: 1,
rotation: 360 * 3,
duration: loaderDuration,
})
// Move to the bottom left corner
this.animationState.pageLoaderTimeline.to(this.DOM.wheelWrapper, {
// Reset the relative transformation
xPercent: 0,
yPercent: -100,
x: 20,
y: innerHeight - 20,
scale: 1,
duration: 1.25,
onComplete: resolve,
})
```
Done!
Let’s move to page intro and on scroll animation.
The first thing we see is the hero plane flowing in from the bottom of the viewport while waving on motion.
So what we need are some values that will be tweened by GSAP and passed to shader as uniform variables. In our case, there’re two values: `translationY` and `wiggle` (you can call them however you like).
```js
createPageAnimations() {
// New timeline
this.animationState.pageIntroTimeline = gsap.timeline({})
// Values to tween
this.animationState.pageIntroValues = {
translationY: 1000,
wiggle: 1500,
}
}
```
We’ll separate movement and wiggle into two parts because we want different duration for each. In case of translation, we can use curtains `plane.relativeTranslation.y` reactive property. To wiggle the plane, we need to pass the value to uniform.
Translation:
```js
// hero plane intro
this.animationState.pageIntroTimeline.to(
this.animationState.pageIntroValues,
{
translationY: 0,
duration: 1.5,
onUpdate: () => {
// plane translation
this.DOM.heroWebGlPlane.relativeTranslation.y =
this.animationState.pageIntroValues.translationY
// Don't forget to ask curtains to render, since we only render on scroll
this.curtains.needRender()
},
},
'start'
)
```
Wiggle:
```js
// hero plane intro
this.animationState.pageIntroTimeline.to(
this.animationState.pageIntroValues,
{
wiggle: 0,
duration: 2,
onUpdate: () => {
// update uniform value
this.DOM.heroWebGlPlane.uniforms.scrollEffect.value = this.scrollEffect + this.animationState.pageIntroValues.wiggle * 0.2
this.curtains.needRender()
},
},
'start'
)
```
Plane intro — done. Next, h1 heading.
We’ll use SplitType to split the text into lines and each line with a stagger effect:
```js
// Set h1 visibility back to visible
this.animationState.pageIntroTimeline.set(this.DOM.h1, {
autoAlpha: 1,
})
// h1 intro
const splitH1 = new SplitType(this.DOM.h1, {
types: 'lines, words',
lineClass: 'line-wrapper',
})
this.animationState.pageIntroTimeline.from(
splitH1.words,
{
yPercent: 100,
duration: 0.6,
stagger: 0.075,
},
'start+=1.5'
)
```
Next, wheel on scroll rotation:
```js
// wheel rotation on scroll
this.animationState.pageIntroTimeline.to(this.DOM.wheel, {
rotate: 360 * 4,
scrollTrigger: {
trigger: this.DOM.pageWrap,
scrub: 1,
start: 'top top',
end: '+=10000',
},
})
```
And finally, we’ll animate all text/paragraph elements that are revealed on scroll.
In html, every element that needs such animation has `data-animation=”paragraph”` attribute. We select all these elements and store in an aray in our DOM object:
```js
DOM = {
...
paragraphs: [...document.querySelectorAll('[data-animation="paragraph"]')],
...
}
```
Let’s split text elements into `lines` and nest them into `line-wrapper` so that we can set `overflow: hidden` on the wrapper.
```js
// iterate over each paragraph
this.DOM.paragraphs.forEach((paragraph) => {
// in CSS we set .line-wrapper to have overflow: hidden
const parentSplitText = new SplitType(paragraph, {
types: 'lines',
lineClass: 'line-wrapper',
})
// We'll be animating these lines
const splitText = new SplitType(parentSplitText.lines, {
types: `lines`,
})
}
```
And finally, animate `splitText.lines`:
```js
// Set paragraph visibility to visible
gsap.set(paragraph, {
autoAlpha: 1,
})
// Animate lines when they are 90% from top of the viewport, almsot at the bottom
// Navbar elements will animate immediately
gsap.from(splitText.lines, {
autoAlpha: 0,
yPercent: 150,
stagger: 0.1,
duration: 0.75,
ease: 'power.out4',
delay: 0.5,
scrollTrigger: {
trigger: paragraph,
start: 'top 90%',
once: true,
},
})
```
And that’s it!
We’ve implemented everything I wanted to cover.
I think it’s a pretty nice project and I definitely learned a lot working on it and I hope you too.
If you know something that can be optimized, improved, or fixed, please let me know, I am always open to feedback.